

Risk/reward ratio compares how much you stand to lose on a trade against how much you stand to make. Risk $100 to potentially earn $300 and your risk/reward is 1:3. It is the first number I calculate before placing any trade — and in my experience, the one most retail traders get subtly wrong.
The dogma you will hear everywhere is “aim for a minimum 1:3.” It isn’t bad advice in isolation. But it comes from a specific context — trend-following strategies where low hit rates force you to rely on large winners to be profitable. The moment you apply it universally, it starts hurting more than it helps. A scalper forcing 1:3 trades will skip 80% of their legitimate setups. A mean-reversion trader chasing 1:3 will simply never hit targets, because the target sits where price has no reason to go.
The truth nobody really teaches: the risk/reward ratio on its own tells you almost nothing. It only matters when paired with your actual win rate on a given setup. A 1:1 with a 60% win rate beats a 1:4 with a 20% win rate. That interaction is what this guide unpacks — along with the formula, a free calculator, an expectancy heatmap that shows every RR × win rate combination at a glance, the gap between theoretical and realized RR, and the right ratio for each trading style.
What risk/reward ratio is (and the formula)
The risk/reward ratio compares the size of your potential loss on a trade to the size of your potential gain, expressed as 1:X. It is a per-trade measurement, calculated at the moment of entry — before anything has happened.
The formula is straightforward:
Risk/Reward = (Target − Entry) ÷ (Entry − Stop) · for a long trade
Risk/Reward = (Entry − Target) ÷ (Stop − Entry) · for a short trade
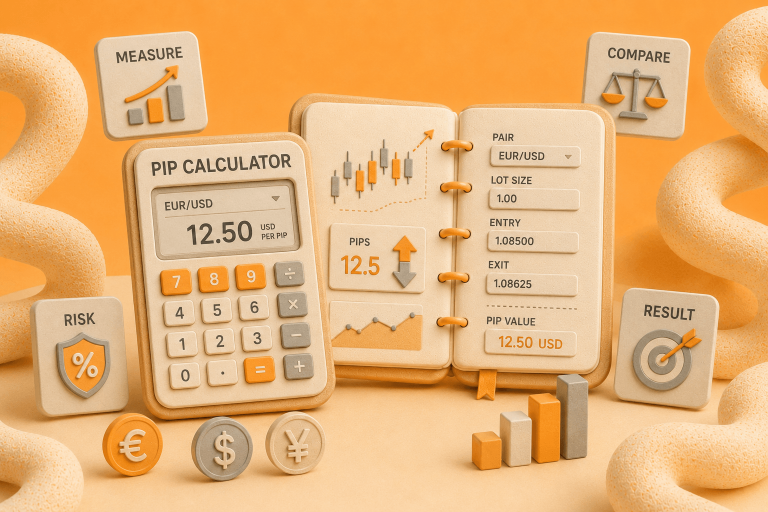
A worked example makes it concrete. You buy EUR/USD at 1.0850. Your stop loss is at 1.0820, and your take profit sits at 1.0910.
- Risk: 1.0850 − 1.0820 = 30 pips
- Reward: 1.0910 − 1.0850 = 60 pips
- RR: 60 ÷ 30 = 1:2
Traders usually express this as “1R” (the amount risked) and targets as multiples — “+2R win,” “−1R loss.” This gets rid of dollar amounts, which vary with account size, and lets you compare trades across strategies and years.
The math you need to see before anything else
Before you think about “what RR should I aim for,” you need to internalize a single chart. It answers the only question that matters: how often do I need to be right at each RR to break even?
| Risk/Reward | Break-even win rate | Expectancy @ 40% | Expectancy @ 50% | Expectancy @ 60% |
|---|---|---|---|---|
| 1 : 0.5 | 66.7% | −0.40R | −0.25R | −0.10R |
| 1 : 1 | 50.0% | −0.20R | 0.00R | +0.20R |
| 1 : 1.5 | 40.0% | 0.00R | +0.25R | +0.50R |
| 1 : 2 | 33.3% | +0.20R | +0.50R | +0.80R |
| 1 : 3 | 25.0% | +0.60R | +1.00R | +1.40R |
| 1 : 5 | 16.7% | +1.40R | +2.00R | +2.60R |
| 1 : 10 | 9.1% | +3.40R | +4.50R | +5.60R |
Three things this table changes about how you think:
A 1:1 setup needs only a 50% win rate to break even — and that is before spread or commissions. If you have any edge above 52–53%, a pure 1:1 strategy is profitable. This alone breaks the “always 1:3” rule.
A 1:3 setup needs only a 25% win rate to break even. Sounds easy until you realize what 25% win rate actually feels like. You will have losing streaks of 6, 7, 8 trades in a row. The math works mathematically but collapses psychologically for most traders.
A 1:10 setup needs 9.1%. Every lottery ticket has an expected value calculation that works out on paper. Almost no discretionary setup in liquid markets sustains this hit rate across hundreds of trades — the target distance stretches beyond the market’s typical volatility.
The break-even column is the cliff edge. What you actually need is your realistic win rate to be meaningfully above that number, because real trading costs (spread, slippage, commissions) eat into the math.
The misconception that kills most traders’ RR thinking
The industry has taught a generation of traders that higher RR is always better. It is not. Here is why.
Risk/reward and win rate are inversely related. When you stretch your target further, you are asking for a bigger move. Bigger moves happen less often. You cannot freely choose an RR — the market’s volatility and your stop placement decide most of it for you.
Take a look at two perfectly valid strategies side by side:
Strategy A — Mean-reversion scalp, 1:1 RR, 60% win rate Expectancy per trade: (0.6 × 1R) − (0.4 × 1R) = +0.2ROver 100 trades: +20R Psychological load: 40 losses out of 100. Manageable.
Strategy B — Trend-following swing, 1:5 RR, 25% win rate Expectancy per trade: (0.25 × 5R) − (0.75 × 1R) = +0.5ROver 100 trades: +50R Psychological load: 75 losses out of 100. Brutal.
Strategy B is mathematically better by 2.5× — and most people cannot trade it. The losing streaks in B will break discipline long before the math pays off. Strategy A compounds slower, but most humans can actually execute it.
The lesson: the best RR for you is not the highest possible. It is the highest RR you can psychologically execute with your real win rate.
How to calculate RR correctly on a chart
Most beginners get this part slightly wrong. A few common errors:
- Calculating after entry. RR must be fixed at the moment you place the trade. If you move your stop or target mid-trade, you are no longer measuring what you planned.
- Flipping the order. Some traders write “3:1” when they mean 1:3, or compute reward/risk instead of risk/reward. Use the same notation every time — 1:X, where 1 is always the unit of risk.
- Using arbitrary targets. “I’ll take profit at a round number” is not a method. Your target needs to come from the chart — prior highs, range boundaries, measured moves, key Fibonacci levels — not from a desire to make RR look good.
- Ignoring the spread. The spread between bid and ask is paid on both sides. On a 30-pip EUR/USD stop with a 1-pip spread, you are actually risking ~31 pips to make ~59 pips. Your paper 1:2 is a real 1:1.9.
Once you have honest numbers, calculate RR before you commit. If the trade setup has a natural 1:1.2, that does not mean you should stretch the target to fake a 1:3. It means you decide whether 1:1.2 at your historical win rate for that setup is profitable.
The RR calculator
Use this to check any setup before you press the button. Enter your entry, stop, and target — it gives you the ratio, the break-even win rate you need, and the expectancy at three realistic win rate scenarios.
The “expectancy at your win rate” section is the one worth paying attention to. If the number is green at 50%, the trade has positive expectancy even if you are a coin-flip trader. If it only turns green at 65%, you need a specific reason to believe this particular setup hits that level.
Theoretical RR vs. realized RR
The RR you calculate at entry is almost never the RR you actually capture. Four things quietly degrade it:
Spread and commissions. On major FX pairs, spread is 0.5–2 pips. On smaller accounts it can be a meaningful percentage of your risk. A 1:2 theoretical becomes 1:1.7 after a 1-pip spread on a 30-pip stop.
Partial exits. Many traders scale out at 1R, 2R, 3R. If half your position exits at 1R and half at 3R, your realized average on that trade is 2R — even though “the target” was at 3R. Realistic, but it changes the math.
Trailing stops. A trailing stop moves up as price moves in your favor. It “protects profit” but also often exits trades at 1.5R–2R when the original target was 3R. Realized RR comes in consistently below theoretical.
Gaps and slippage. Your stop is at −1R on paper. In practice, on weekend gaps or fast markets, your fill might be at −1.3R or worse. Stops are a commitment to exit, not a guarantee of price.
My honest rule of thumb: if you plan for 1:3, assume realized will be 1:2 to 1:2.3. Build your expectations with that margin. The traders who get blindsided are the ones who built their strategy around theoretical numbers and never measured what they actually captured.
Stop placement decides your RR (more than target placement)
Here is the counterintuitive part. Most traders think about targets when they think about RR. The reality is that stops do most of the work.
Your stop has to go somewhere meaningful on the chart. Below a swing low. Beyond the volatility range. Under a key moving average. Outside the ATR envelope. You are not free to put it “wherever 20 pips below entry” — the structure dictates the distance.
Once your stop distance is fixed, your RR is mostly a choice of how greedy your target is. Say your stop is 50 pips away because that is where the last swing low sits. Now:
- Target at +50 pips (1:1 RR) — typical hit rate 55–60%
- Target at +100 pips (1:2 RR) — typical hit rate 38–45%
- Target at +150 pips (1:3 RR) — typical hit rate 22–30%
All three are valid. Which is optimal depends on what your strategy has done historically. The point is: you did not choose your RR by choosing the ratio. You chose it by choosing the target relative to a stop distance that the chart dictated.
This is why the same trader can take one trade at 1:1 and another at 1:4 — the chart is offering different setups with different natural structures. Rigid RR rules ignore this.
What RR should you aim for — by strategy
There is no single correct RR. There are RR ranges that fit each trading style. Use the matrix below as a starting point, then adjust based on your own backtested win rates.
| Strategy | Typical RR | Typical win rate | Why this combination |
|---|---|---|---|
| Scalping | 1:0.7–1:1.5 | 55–65% | Targets are tight (a few pips to the opposite side of a micro-range). Stops are equally tight. High frequency + high hit rate is where the edge sits. |
| Mean reversion | 1:0.8–1:1.2 | 55–70% | Target is the mean (e.g., 20 EMA). Stop is beyond the extreme. The setup pays you the distance from extreme to mean — rarely more. |
| Day trading (intraday trend) | 1:1.5–1:2.5 | 45–55% | Typical intraday move is 2–4× your stop distance. Balanced between RR and WR — the comfort zone for most discretionary day traders. |
| Breakout trading | 1:2–1:4 | 35–45% | Measured-move targets (range height projected from breakout point). Many breakouts fail — win rate is modest, but the winners are clean and large. |
| Swing trading (2–5 days) | 1:2–1:4 | 40–50% | Holding through noise for bigger structural moves. Stops need room, targets need to justify that room — nothing under 1:2 survives the math. |
| Position / trend following | 1:3–1:10 | 20–35% | Catching multi-week or multi-month trends. Most trades fail (trends are rare). The few that work carry the entire expectancy — they must be huge. |
Two observations worth calling out:
Scalping lives in 1:0.7 to 1:1.5 territory. Scalpers make their money on a high hit rate, not big winners. A scalper forced into 1:3 trades will collapse — the setups simply do not exist that frequently in 1-minute charts.
Position trading and trend-following need 1:3 or higher. These strategies deliberately trade low win rates (20–35%). Without large winners, the math does not work. A position trader aiming at 1:1 is not a position trader.
Two real trades: one 1:3, one 1:1 — both profitable
I want to show two trades from last month. Both made money. Neither conforms to the mainstream “always 1:3” advice if you apply it literally.
The swing trade works because the setup has a clear measured-move target 90 pips away and my win rate on this specific setup (breakout-pullback on 4H in trending markets) is around 42%. At 1:3 with 42% WR, expectancy is +0.68R per trade — very strong.
The scalp works because the range is clean, the target is the opposite side of the range (20 pips), the stop is tight at the range extreme (20 pips), and my win rate on this setup is around 62%. At 1:1 with 62% WR, expectancy is +0.24R per trade — smaller, but over 5–10 trades per day it compounds.
Both are correct applications of RR. A trader who dogmatically refuses anything below 1:3 would miss the scalp entirely — and miss genuine edge.
Common mistakes in RR thinking
The one I see most often is moving the stop to maintain the ratio. A trade moves against you a little. The “planned” 1:2 is now 1:1.4. The trader moves the stop wider to “keep the reward-to-risk intact.” This is not risk management; it is the definition of risk expansion. Once the stop is wider than planned, the original RR calculation is fiction.
The fix is simple: RR is a planning number, not a live number. Once the trade is on, your stop and target should only move in one direction — toward break-even, or via a trailing rule you defined before entry.
Realistic expectations when you start using RR seriously
A few things that change when you take RR seriously. A few things that do not.
What changes:
- Trade selection tightens. Setups with bad natural RR (too-wide stops, targets blocked by resistance) get skipped.
- Patience increases. You stop taking profits at 1R when the setup was clearly a 1:3, just because the P&L looked good.
- Losing streaks feel different. When you know mathematically that a 1:3 strategy is supposed to have 6-trade losing runs, you stop panicking at the third loss.
What does not:
- You still need an entry edge. RR does not turn a random entry into a profitable strategy.
- You still pay real costs. Spread, commissions, slippage — these do not respect your RR math.
- You still need a sample size. 20 trades is not enough to know if your RR × win rate combination is actually positive.
RR is a framework. It is not a strategy.
The expectancy heatmap — find your zone
If you remember nothing else from this article, remember this one chart. It plots every realistic combination of win rate and risk/reward ratio on a single grid. Green cells are profitable, red cells lose money, and you can instantly see where your strategy lives.
| Win rate ↓ RR → |
1 : 0.5 | 1 : 1 | 1 : 1.5 | 1 : 2 | 1 : 3 | 1 : 5 |
|---|---|---|---|---|---|---|
| 20% | −0.70 | −0.60 | −0.50 | −0.40 | −0.20 | +0.20 |
| 30% | −0.55 | −0.40 | −0.25 | −0.10 | +0.20 | +0.80 |
| 40% | −0.40 | −0.20 | 0.00 | +0.20 | +0.60 | +1.40 |
| 50% | −0.25 | 0.00 | +0.25 | +0.50 | +1.00 | +2.00 |
| 60% | −0.10 | +0.20 | +0.50 | +0.80 | +1.40 | +2.60 |
| 70% | +0.05 | +0.40 | +0.75 | +1.10 | +1.80 | +3.20 |
The reason this chart beats a list of rules: it forces you to think about RR and win rate together, never separately. A trader who looks at this heatmap once, honestly plots their own measured numbers on it, and stays in the green zone has already beaten 80% of retail.
The four rules that survive every strategy:
- Calculate RR before entry. Never after.
- Stops come from structure. Targets come from structure. Never from wanting a nicer ratio.
- RR alone tells you nothing. Always pair it with your measured win rate on that setup.
- Assume realized RR is 65–75% of theoretical. Plan with that margin.